Wednesday 23 March 2016

Birthday-Themed Scrapbook Layout using Papericious papers | Pictorial

Hello and Good morning friends ! :)

Hope you all are doing great !

This is Jasleen, back with a new post based on this month's challenge theme. And as you all might be aware of by  now, that this month we are celebrating Lulupu's 4th birthday. (To view this month's challenge details, please click HERE.)  And of course the celebration won't be complete without some fun games, exciting giveaways and amazing prizes. :)

Link up for the Birthday Raffle worth Rs.15000 prize HERE

For Game#1-Crossword puzzle, check it out over HERE and
 
Game#2 -Lulupu's instagram contest, over HERE!

Follow us on @lulupu.tcl on Instagram! :)
 

I have a scrapbook layout to share with you all, featuring the gorgeous Papericious pattern papers- Often Collection, that I recieved in my DT kit. The trendy designs and vibrant colours of the papers from 'Often' collection make it a perfect choice of papers for making cute and trendy layouts. :)


I followed the second row-R2-- Balloons, papers, washi and banners. 
 
 
Sharing the step-by-step making process below :-


1.Firstly, I  decided which picture I wished to scrap about and the papers I wanted to use.


2. On a 12 by 12 sheet of sturdy card stock, I decided where I wanted the main picture to be, and  stamped multiple number of  'Happy Day' sentiments from Altenew Hennah Elements stamp set accordingly,  as shown above.


3. Then I sprinkled some Lindys' magical micas powder- Bubbly  over the stamped area and sprinkled some water droplets over it. That gave me a beautiful peachy and shimmery watercoloured effect.
 
3. Then I wound around a silver thread to make a rough circle . This step took the longest. It was quite difficult to hold the silver thread in place due to its stiffness. That's where my daughter came to my rescue ;) I asked her to hold it at one side while I stick the other side down, using some tacky tape.  :)
 
 
4. Now came the most challenging part (for me atleast :P) and that is, embellishing. I started off by matting the main picture with some layers of  patterned papers and adhereing it down. I die cut a few circles to serve as balloons with the twines, wooden buttons, added the handmade felt bow, made some banners out of the same patterned papers and stuck it in the corner, washi tape, added some suitable die cuts received with the Papericious papers., some butterflies ,enamel dots and sequins. You can find the enitre collection of the beautiful Papericious papers  HERE and the new arrivals HERE  .


5. Sprinkled some Lindy's magical micas powder on the right hand side as well, and splattered some navy blue coloured ink droplets here and there.

 
Some close-up views


You know what's the best thing about making a scrapbook layout? Well, they say crafting has no rules and one thing that completely holds true to this adage is creating a scrapbook LO. There are still some guidelines for different styles of crafting, but when it comes to scrapbook layouts, I think it's more of a liberal sort, we are free to follow any design, any embellishment, we can stick to one colour scheme or we can choose to go wild with the colours, the choice is entirely ours. And this  creative freedom is what makes it more enjoyable :) Don't you think?
 
I hope you feel inspired to try making a scrapbook layout yourself, if you haven't tried already. Just choose your favorite birthday pic and scrap to your heart's content. Waiting to see your entries HERE .
 
Supplies from Lulupu store :-


3.  Altenew Hennah elements stamp set (used for the sentiment 'happy day')
 
That's all from my end now. Thanks for stopping by.
 
Happy 'Holi'days ! ;)
 
--Jasleen
Friday 18 March 2016

Altered bottle - Heartfelt flowers and Papericious buttons

Hello Dear Friends!
I am Suchi here with you all today!
As you know it is Lulupu's Birthday month! Are YOU playing with us? There are a number of prizes!!! 

Link up for the Birthday Raffle worth Rs.15000 prize HERE

For Game#1-Crossword puzzle, check it over HERE and Game#2 -Lulupu's instagram contest over HERE

Follow us on @lulupu.tcl on Instagram! :)

Now, let me share my inspiration project with you! This is an altered bottle! Guess which kind of bottle I have altered! :)

It is "Amul cool" bottle! :) 

I used Heartfelt Creations -Tattered blossoms  stamp from the store. Those buttons are from Papericious which you can find HERE

Lulupu store has latest new arrivals which you can take a look at!


Here is a close-up of the altered bottle!


And another look! :)
Let me know if you guys would like to have a tutorial on it, I will give one! :)


Wednesday 16 March 2016

Mixed Media Canvas using Inka gold - Pictorial


Hello friends... Irma here , I'am so glad to meet you again. This month our team is very Happy because this is our special month ! LULUPU turns 4 & we have so many surprises for you.... xoxoxo:)

To celebrate our Birhtday we have so many many prizes for you !! 

First  : a super Bumper Raffle  worth Rs 15000 worth from Prima Marketing to be won...so what you have to do..., you will join in raffle  here

Second : Lulupu Bithday Crossword Puzzle !! one Lucky winner will receive a gorgeous package of goodies!  How to Play ?? lets see here


Third : Lulupu Bithday Insta Contest !! one Lucky winner will receive a gorgeous package of goodies!  How to Play ?? lets see here


but wait.... we still have another game to celebrating our birthday with a Grid Birthday Challenge
lets see what our team make a create wonderful Birthday Grid for all of you to play along with us!

so this is our month Challenge !

Birthday Grid #59


Rules of this month Challenge is  to create a card or Layout  on a Birthday Theme , and 2 (two ) prizes for the winner in each category .For complete information please visit here

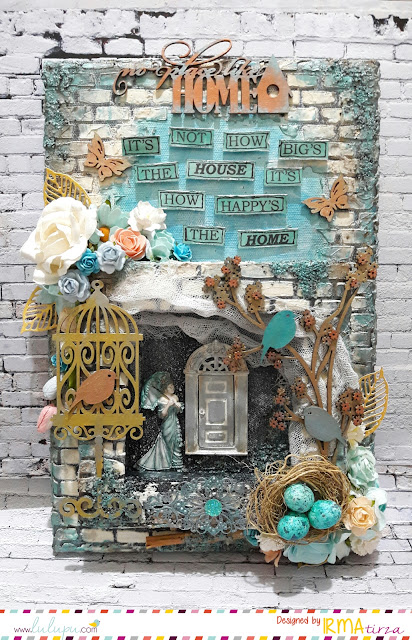
So guys....what I created for this special time is a mixed media canvas....

I made a home decor with a double canvas and have shared a complete pictorial step by step so i hope it will help you to create something similar or even better . : )

here it is!


Step by Step Pictorial

 I prepared 2 (two) canvases size 20 cm x 30cm and 15cm x15cm


draw a line where you want to add the small canvass on top


Paint around with black gesso. Do the same with a small canvas on back  

Create a bricks texture with modelling paste and a stencil


do the same as the previous one for the smaller canvas


Now stick the smaller canvas on the top of the bigger canvas with
 a hot glue gun and spray with ink .


I used a mica powder at the edge and sprayed with a little water  


inside the small canvas I covered with Texture paste


 and added a cheese cloth as embellishment


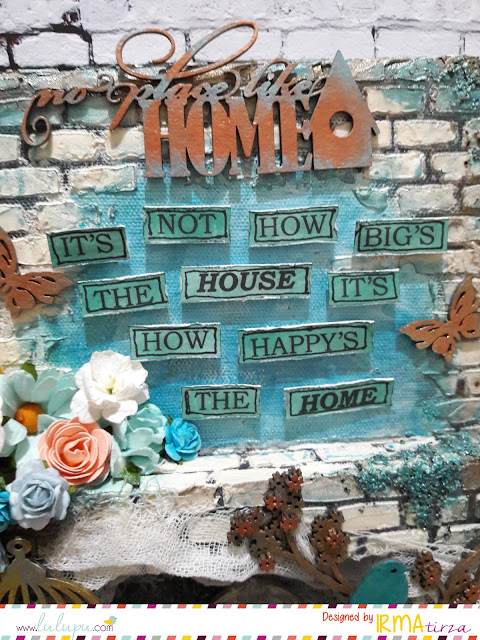
I printed my sentiment and coloured it with distress ink  ( evergreen bough )


after that I distressed my journaling with distress tool and fussy cut word by word


with a black sharpie pen I then went around the edges 


I colored  my title with inka gold in Copper Color


I colored  the chippie bird cage with inka gold Gold Color


and I colored my resin with perfect pearls

also a charm and the door I coloured with Inka Gold in Ice Blue color


after I finished coloring all embellishment I decorated them on my canvas 


after I fixed all things in the right composition I repainted again with inka gold


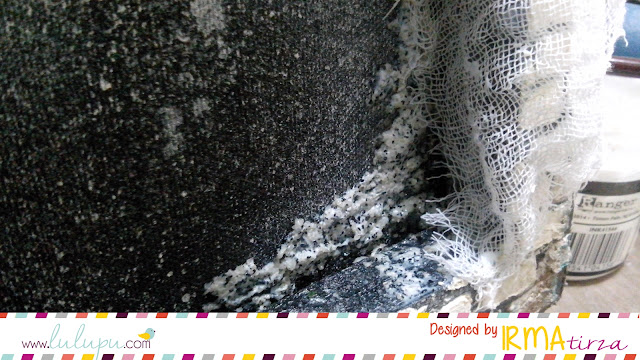
I thought I missed something ...yes a texture paste ! so I added a few at the corner and some place to give more texture 


After I added some texture paste I colored with inka gold in Turquiz Gold

here is some closer


That's all from me, I hope  I've inspired you to try out make something different
All the product I used , you will find at Lulupu Craft Store

There is still time to submit your wonderful project and we can't wait to see your work!

Have a great days, Happy crafting !

Hugs,
Irma Tirza


Monday 14 March 2016

Easel Shaker Card - Guest Designer Tanvi Shah

Hello Friends,

Hope you had a fab weekend! We are back with yet again inspiration for our current special Birthday challenge!

Today I am welcoming Tanvi Shah as a guest designer to share an inspiration for you all with a special kit sent to her!


She shared a gorgeous Easel Shaker card and wow it wobbles! thanks Tanvi for joining us, this is such a delightful card!


Over to Tanvi for more detail.


To create the card base I folded a 11x4 ¼” piece of black card stock in half. Then I folded the front panel in half again & this formed the base of the easel.


I then trimmed purple card stock & pattern papers (Papericious - Often) to add layers to the black base. I glued the inside panel with foam tape, this allows the easel to sit up.

For the shaker element I stamped some balloons with Color box chalk inks (I have used R2 from the “birthday grid” – balloons, pattern paper, washi tape & banners). I made some banners using washi tape & adhered this to the front of the shaker.


While making the shaker part I decided to add a twist to this shaker card by mounting it on another die cut with an ACTION WOBBLE! This was so fun & can we call it the wobbling shaker card?


Thank you Karuna for allowing me to join the 4th birthday bash! Its always a pleasure to be back here! Hope I have inspired you all to join the challenge!

Love, Tanvi.

Friday 11 March 2016

Adult Coloring Books Video Review by Guest Designer Ujjwal

Hi there,

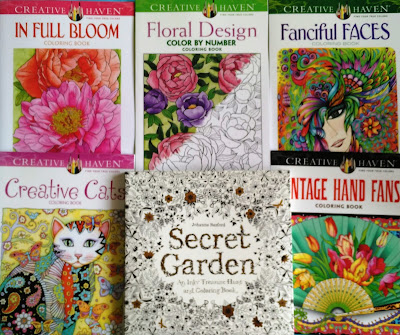
Today we have a fabulous video review on the trending coloring books on our store. We stocked up on some fabulous adult coloring books and we are almost out of stock! So ad a part of our celebration we invited Ujjwal to try on some coloring in our cute Creative Haven Adult coloring books which you can find HERE.


She has done a detailed review to help you with ideas on various mediums that you can work on with and how they turn out. Thank you so much Ujjwal for taking time to join in our celebration and sharing your feedback on these wonderful books. I agree these are true stress busters!

Sharing a few Glimpses of the same here :)

Colouring with Alcohol Markers

Coloring with Watercolor Pencils

Coloring with watercolors


Highlight with white pen marker.


And for the complete look and feel do check out the video here


Thanks for stopping by!

Do join our Raffle, Games and challenge for some awesome prizes!!

Love
Karuna